Categories
How Do You Soundproof A Floor?
How do you soundproof a floor?
Soundproofing a floor helps reduce noise transmission between floors. The products required are determined by your existing floor build up you have and whether you’re looking for a reduction on impact or airbourne or maybe both.
Impact noise can come from loud footsteps or dropping/banging things on the floor and airbourne from talking, loud music or a television.
The types of floors that are often encountered are timber joists, floorboards and concrete floors. The products available will change depending on the floor type that you will be working on.
Whether it’s a refurbishment of a property or even a new build there are many products and solutions to be considered and the JCW team can offer advice on just what you need to do.
Domestic properties – flats and upstairs floors will almost always be timber joists & floorboards. These types of floors will always have a problem with sound transmission. Thankfully there are many products available to help with wooden floor soundproofing.
Acoustic Decks
These overlay decks are laid onto of your existing floor and provide good airborne and excellent impact noise protection and is an excellent low cost choice for floor upgrades in lofts and extensions.
The JCW Acoustic Decks found via the link should be layed in the flowing way:
JCW Acoustic Decking floor panels are supplied in 2 standard board sizes dependant on the material.
T&G Chipboard 2400mm x 600mm.
T&G Cement Board 1200 x 600 & T&G MDF 1200 x 600mm.
All acoustic panels are laid as a floating floor (i.e. no mechanicalfixings). The boards must be dry and acclimatised at least 24hours prior to installation, this will minimise any expansion or contraction after installation.
The substrate or joists should be flat, dry, and free from all debris. Acoustic boards are best laid towards the end of the project to protect from general trades, high floor loadings and moisture leading to expansion.
- The floor area/s to be overlaid should be carefully planned prior to commencing installation to minimise wastage. There are two overlay board types;
- Non-Structural onto an existing sub-floor.
- Structural for Direct to Joist.
The boards must be laid on to flat or levelled joists in the opposite direction of the joists. Direct to Joist boards can also be laid onto an existing sub-floor.
- Ensure that the wall surfaces are prepared (plaster skimmed or plaster boarded down to the level of the sub-deck). Any gaps will facilitate the unwanted transmission of sound via the wall edges.
- Apply 5mm foam flat wall JCW Perimeter Edging Strip or L shaped strips to the base of all perimeter walls allowing approximately 15mm excess foam above the finished acoustic board height, this can later be folded down on top of the acoustic floor surface to isolate the skirting boards. Any unwanted excess foam can then be cut back with a sharp knife.
- Remove any tongues at the wall edges, then cut & scribe the first corner board into place and butt up to (do not compress the JCW Perimeter Edging Strip) the Edging Strip. All T&G board joints must be fully adhesive bonded using our recommended adhesive. The last board in the first row should be cut to length and the off-cut carried forward to begin the second row.
- Proceed with the second and successive rows ensuring that all board joints are staggered. The last row of boards will require accurate cutting & scribing to butt up to the wall. Any minor gaps between the JCW Perimeter Edging Strip and the acoustic board must be filled with JCW Acoustic Sealant/Mastic. It is imperative that the JCW Perimeter Edging Strip is not compressed in order to maintain acoustic isolation and an allowance for expansion.
- At doorways: the acoustic floor should not be continuous with adjoining areas. At the door threshold leave a 5mm gap between the adjoining acoustic boards and fill with JCW Acoustic Sealant. This action will ensure that the acoustic integrity is maintained within the room that is being Sound Tested. Note; if the sub-floor at the doorways is not flat, the acoustic boards may require additional base support to reduce compressive joint movement. Additionally the surface joints could be sanded up to 5mm to level if required.
- The finished floor should not be walked on for a period of up to 24 hours to allow the adhesive to cure undisturbed. NOTE; PVA adhesive will not cure in temperatures below 5 ̊ Celsius. Ensure that the board joint adhesive has fully cured prior to overlaying any final floor covering.
Any penetrations through the acoustic floor and beneath the separating ceiling must be correctly detailed and dealt with on a site by site basis.
Acoustic Underlay
Acoustic underlay goes underneath a top layer of flooring or carpet and is designed to reduce the transfer fo noise between floors.
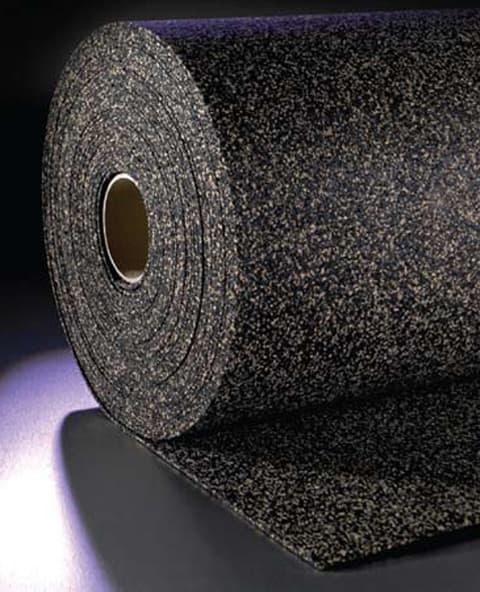
A underlay product that JCW Acoustic Supplies offers is the Acoustic Impacta 4551 matting product to attenuate impact sound at the source.
Installation of this product is detailed underneath:
Preparation:
- It is important that the sub-floor is dry, clean, and free of dust, debris and adequately prepared to enable a good adhesive bond. The level of floor preparation required will be determined by the final floor finish specified.
- JCW Impacta Mat 4551 stretches slightly when rolled up. Unroll and leave 3-4 hours prior to cutting & fitting.
Laying JCW Impacta Mat 4551:
BS 8203; 2001 and the following guidelines should be observed.
- JCW Impacta Adhesive has been tested and is suitable for bonding JCW Impacta Mat 4551 to the majority of base floor types that may be considered. (JCW Impacta Adhesive available on request).
When laying JCW Impacta Mat 4551 into the adhesive ensure any air is removed by pressing from the centre outwards. - Roll JCW Impacta Mat 4551 from end to end & side to side using a 68kg flooring roller.
- Cut & Trim JCW Impacta Mat 4551 using a sharp knife and straight edge. Ensure all edges are butt jointed.
- On completion of the floor area wait for 30mins and roll the floor again.
- The adhesive must be allowed to fully cure prior to overlaying of floor finishes, trafficking and loading in.
- Plasticiser Migration: JCW Impacta Mat 4551 has been tested and is considered resistant to plasticiser migration according the SATRA test report. The full report is available upon request.
Take a look at our Floor Soundproofing page for more products and solutions. Please feel free to give us a call on 01204 548400 or fill out the contact form to speak to our acoustic experts.